Showing posts with label beauty tips. Show all posts

Sunday, June 24, 2012

About Face and the NAKED palette.

Back when I blogged about my wedding plans for EAD way back in 2009, I remember posting a before and after of my wedding makeup trial at the Benefit counter (where I bought some $300+ of makeup that I then used to apply my own wedding makeup) and my surprise at the request of a makeup tutorial from some of the readers. I don't think anyone in real life would beg me for a makeup tutorial, because most likely they've seen more often than not, my forgetfulness at assuring the world that I have eyebrows (since I usually have blonde skin colored wisps above my eyeballs) and laziness in much beyond mascara on the average day. My skin gets shiny quickly, when I do remember that I own red lipstick I forget that I've applied it pretty immediately and end up with a half painted lip as soon as I eat a meal.

That being said, I am around makeup artists most every Saturday, and occasionally I watch with great intent of learning their magic tricks and becoming some phenomenal face shifter. This past 6 months or so I've noticed that every makeup artist seems obsessed with the NAKED palette by Urban Decay. I'm not one to put a significant amount of money into makeup, things that can be used up like makeup seem less useful than the clothes that I can wear over and over again, and even then I prefer shirts and dresses to pants and shoes. The idea of buying $50 foundation over using the clinique bonus time foundation my mom gave me that I mix with moisturizer to create my own tinted moisturizer (which has lasted me quite a while) escapes me, and even though I understand that expensive mascara would apparently transform me completely, it is only meant to last 4 months before your eye germs run rampant so I'd rather by a $5 tube.
NAKED palette photo by me


And so, like a poor fairy tale princess I gave up dreams of the NAKED palette. That is, until I resolved to finally spend the $50 Sephora gift card that a dear friend gave me on it. This was just a few weeks ago. I paid $5 with tax to purchase it, and it has changed my life. Note that life changes are usually small, but nevertheless my life is different. I looked up a tutorial using the makeup palette; and with no consideration of whether the guru on the video has the same bone structure, hair color, eye color, complexion as me (she doesn't), I've faithfully followed it with slight variation and enjoyed myself. Here's the video I watched if you are interested in viewing the tutorial.

and this is a VERY professional iphone photo of the results.

I realize I am quite behind on the times, as there is a NAKED2 palette and that's the next best thing, but I also realize that if people were willing to ask ME for makeup tutorials in 2009 there are a few other behind folks as well. So, NAKED palette = good, if for nothing else, encouraging variation and the remembrance of eyelids. It came with primer (good), and a brush (also good as I was unwilling to invest), and all of the colors are all in one place, which can't be said of my benefit eyeshadow from 2009 that I still have (and are quite similar to some of the colors in the NAKED palette) and the Bare Minerals eyeshadow that I bought sometimes last year (unscrewing all of the different caps and dealing with loose powder escapes me most days).

Other helpful possibilities that make me feel like I've tried:
-SPF foundation mixed with moisturizer= tinted moisturizer (currently I'm using a clinique sample SPF 15 though I'd use 30 if I had it) and the Bare Minerals moisturizer that comes with the starter kit. The real plus for me is that the foundation lasts longer and goes on more evenly than regular foundation and is lighter coverage which I prefer anyway.

-Benefit's eyebrow kit Brow Zings $30 (has lasted me since my wedding (I know you shouldn't keep makeup that long!) and is the only thing keeping me from appearing browless.

-Lipstick as blush. I don't know if it lasts very long (maybe not) but since I don't have the Bene Tint that I wish I had I make do with my super cheap NYC color red lip color and put tiny dots on my cheeks and rub them in.

-Mixing reds to create the perfect red. I use a Covergirl berry lip stain (also since my wedding) and add a classic red (the NYC color lipstick I mentioned above) on top to create the shade I actually want. I've red that for my skin/eye/hair combo I should stick to berry reds but I love the pop of a classic red, so this helps quite a bit. I also use a trick learned from Cup of Jo for longer lasting lipstick while drinking, lick your lips before you take a sip so it won't rub off on your glass. I still eat with wreckless abandon at times and lose all of my lip color in the middle but I'm getting better.

-Alternative to tweezing. No one should ever admit extra facial hair in my book, but since mine is all blonde you'd never know anyway. So hypothetically, I would enjoy removing hair from my chin and upper lip if I had it. And if I did, I'd use the R.E.M spring. The website would have you think it is painless. It is not. I might have no pain threshold. You can not use it on your eyebrows unless you want none, but if you just want to minimize peach fuzz it's something you can do every few days (the more you do it the less sensitive you'll be to the pain) and if you are odd about hair removal and like Biore pore strips like I do you might also like this.

Maybe in another life I will become a shapeshifting facechanger with my own worthwhile tutorials, but for now I'll enjoy picking up tips here and there, trying yet another cheap nailpolish or face mask or face cleanser (my newest like is tresemme's fresh start dry shampoo).


What are your favorite Beauty secrets?

Thursday, December 31, 2009

5 Beauty tips/discoveries of 2009

I am admitting my complete beauty ignorance by posting such a thing, but I've realized that not everything that seems common knowledge actually is. Some of us do live under rocks, and we appreciate when someone can tell us how to look like a ridiculously lovely fox instead of, well, what we look like when we use guesswork. Some of these are old stand-bys and others I've just recently stumbled upon.

1. Wavy Celebrity Hair


I can't believe I didn't do a search for it sooner, but I've been craving long wavy hair forever and while my hair is naturally "wavy," it never looks like I should audition for ANTM. I honestly can't remember the site I found the instructions on, but they were super simple.

Prep: blow dry hair. Heat up curling iron. Spritz a little hair spray on to help the curl stay. Wrap hair around the barrel DO NOT use the clamp. [Simple step that I missed out on all these years. I thought the shirley temple curls would fall into gorgeous waves. Not so.] Alternate directions for more natural waves. You can set the curl by pinning them up with bobbypins but it's not a necessity.

Now that I have long hair (thanks to the wedding in October!) I think I'll be doing this all the time.

2. Black Eyeliner


Ever since I saw The Mummy, I wanted black rimmed eyes that didn't look like a raccoon's. I've realized more and more over the years that not every look works for everybody, and outlining my eyes with an eyeliner pencil or liquid liner doesn't end well. I think it's the sensitivity of my eyes and maybe the moisture in my eyes and skin, but it doesn't stay put for long.

I've tried at various times in my life lining the inside of my eyelids but I always felt like I was doing something you shouldn't, because jabbing makeup into your eyeball seems a bit counter intuitive.

That being said, I'm glad that my very expensive quest for wedding makeup led to laura mercier's black eyeliner. You add water to an eyeliner brush (I bought a cheap flat brush at target and have no complaints though I'm sure a makeup artist would be able to tell you some advantages to the real thing), and dab into the watercolor like block. You line the inside of the eyelids, and voila. The color stays in place and your eyes look amazing. I should probably take some pictures of the difference between lining inside and outside on me. Maybe this post will get an update.

3. DIY straight across bangs

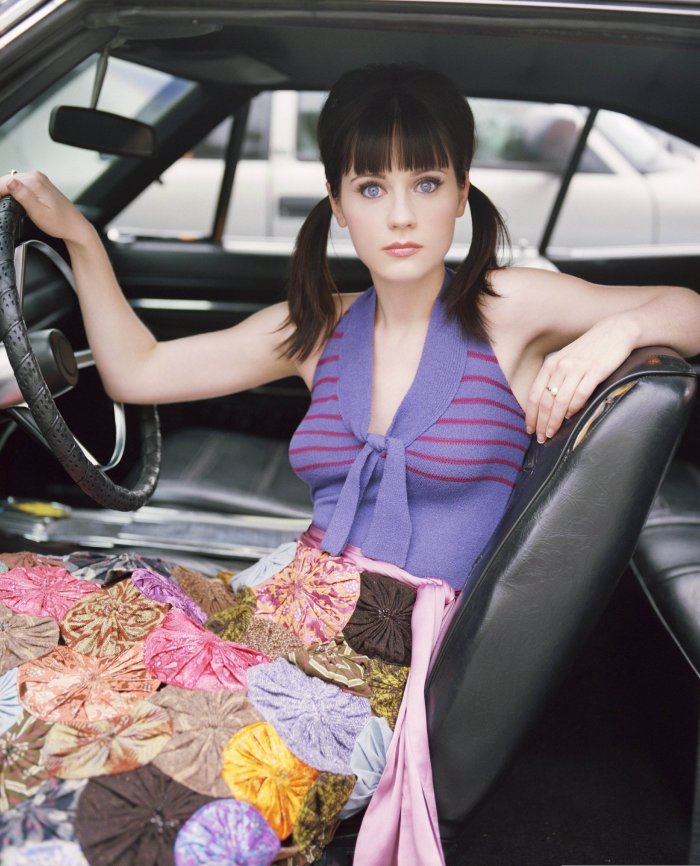
image source the best thing about this pic might be the fact her skirt is made of yo-yos.


Pretty sure I read this tip in Glamour or Elle, but to trim your bangs (which I have required on an off over the past few years by deciding, often in the wee morning hours, that I will once again have straight across bangs) you can simply take the hair you want to cut into your hand (dry) and trim off the end. Not short enough? Trim a little more off.

It's been magical for me, since I had bangs in middle school (it was the big thing, people told me I would look good with them, and I proceeded to have a big ol' velcro roller induced bang curl on my forehead that looked atrocious) and I made the mistake of cutting them myself inbetween haircuts. They were always uneven and I ended up taking too much off. Too bad I don't look like audrey hepburn with short bangs.

Something else I found funny, I went to a secret santa exchange with mallory and ginger, and ginger asked us to raise our hands if we'd ever dated a guy in a band. Garrett has been in bands before, so I did. Then she proceeded to tell us that Stuff White People Like has the theory that a girl with bangs has dated a guy in a band. Pretty sure they decided that solely based on Zooey Deschanel but I'll take it as a compliment.

4. Smoky Eyes


I knew the basic 3 colors (light allover, medium and dark close to the lash line) but I really think the quality of the eyeshadow makes a  difference here. My benefit eyeshadow is so much easier to smooth on than my almay 5 color palette with various blue/grays and now I know to go a lot higher up with the medium and dark colors than I used to. Another benefit of going to a makeup counter for wedding makeup. They don't mind helping you out, so ask questions.

5. Clear Skin


Benzoyl Peroxide has been a friend of mine for years, and as ludicrous and online cultish as it seems (to me at least), there's a website, acne.org/regimen.html that contained the secret to getting the most out of it. It's pretty simple. I'd been using every benzoyl peroxide product I could find for years because it did more for me than salicylic acid and the like, but my skin was never perfect. I tried differin gel because I figured prescription meant better.

The basics of the acme regimen are a gentle cleanser (for example, the orange neutrogena bars), 2.5% benzoyl peroxide, and moisturizer. The most important part is the B.P. and unlike the on-the-spot product implies, you use a lot of it and everywhere you get pimples. It's kind of expensive ($6 for a little tube) and I found an off-brand at my college's pharmacy that I used for a while, but either way, it's worth it. You can even buy it on the acne regimen website. The key is that it is 2.5%, because the 5 and 10% are more drying and irritating on your skin.

Oh yeah, and it bleaches fabrics so I use white sheets and towels. Worth it, and I like white.
Related Posts with Thumbnails